Building Command Line Applications in Spring with Spring Shell
Today, we're going to talk about building command line applications using Spring Shell. Spring Shell allows you to use the programming model, tools, frameworks, and languages that you're used to using every day to build command line applications. We're going to build a command line application called "Dad Joke" that fetches a random dad joke from a public API.
Setup
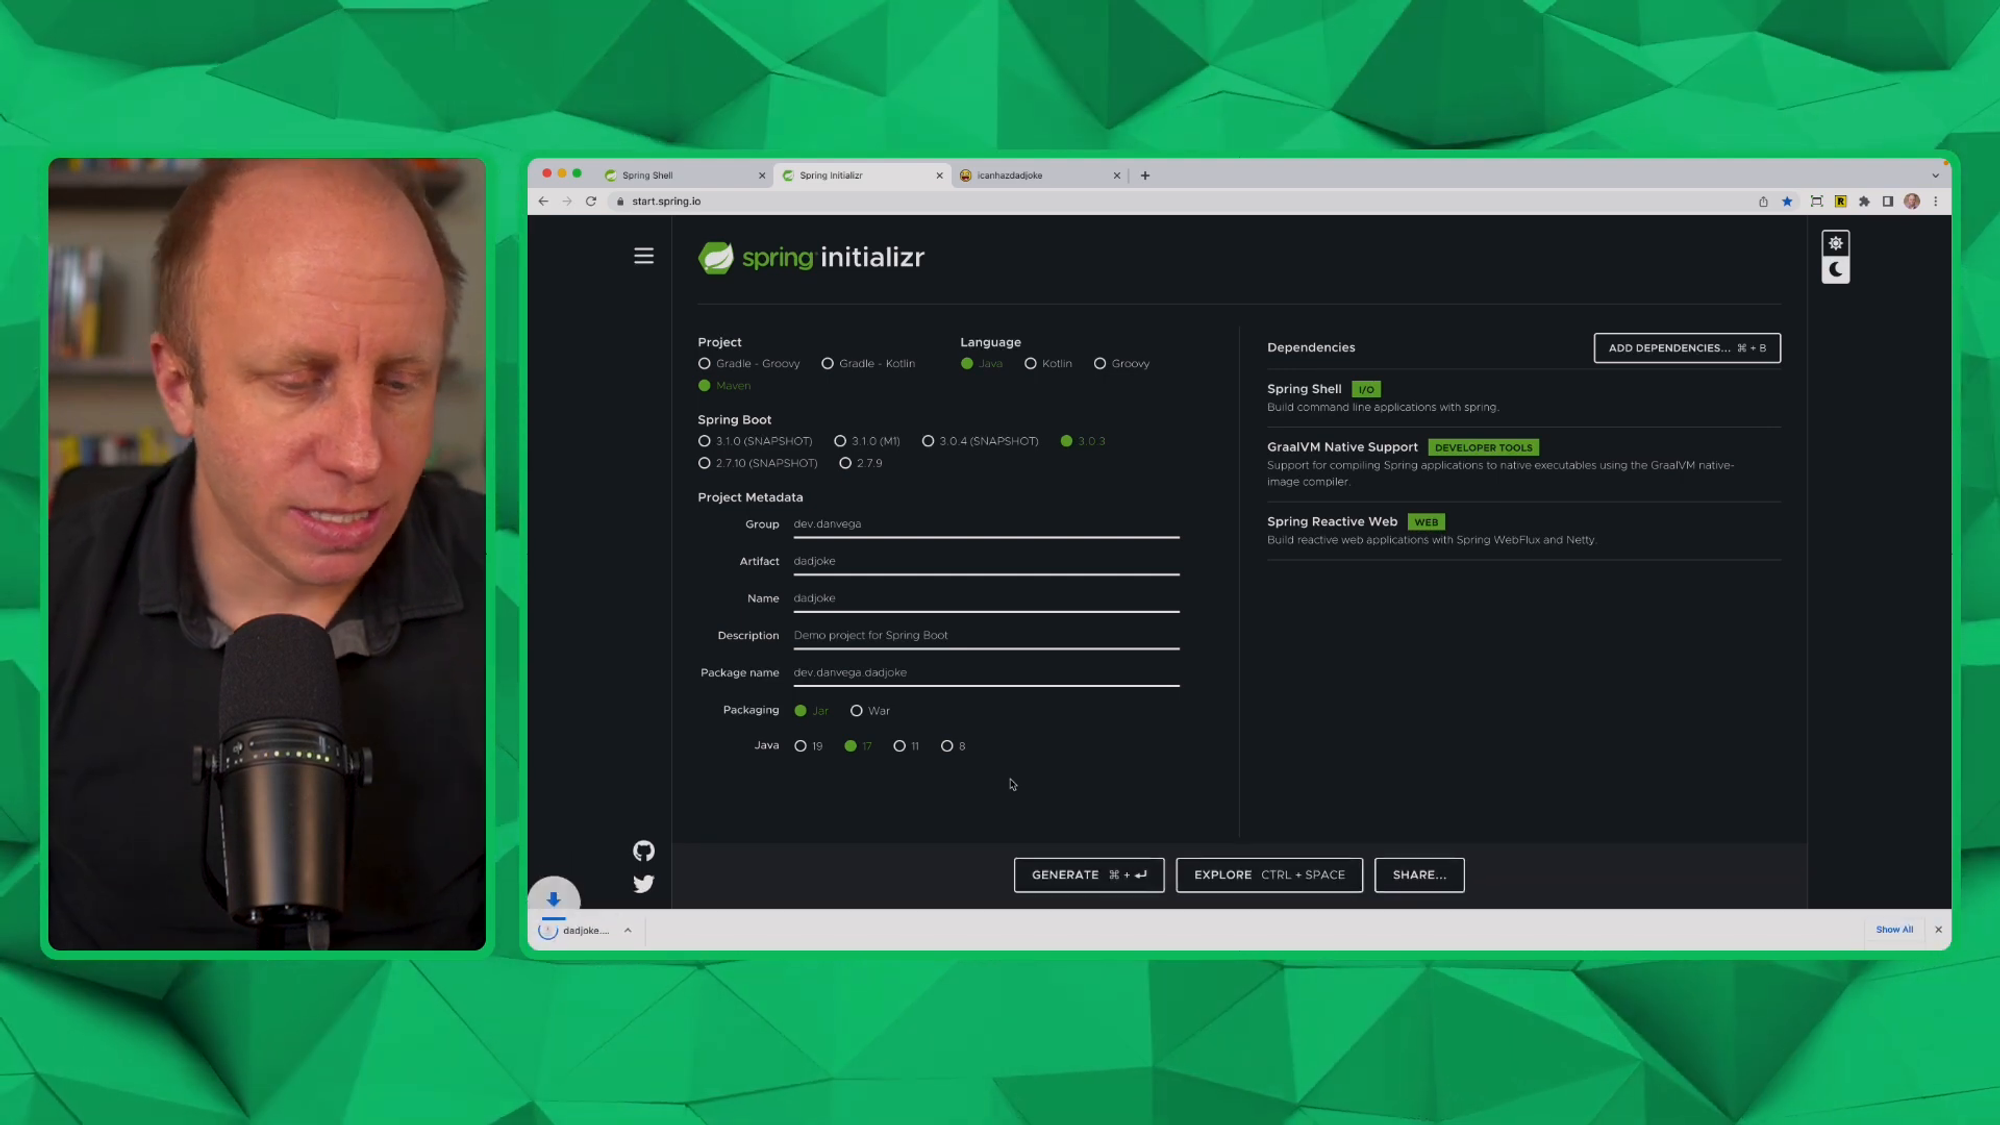
- Head over to https://start.spring.io to create a new Spring Boot project.
- Choose the "Java" project type and "Maven" as the build tool.
- Use the latest stable release of Spring Boot (3.0.3 at the time of this recording).
- Set the artifact name to "DadJoke" and use the following dependencies:
- Spring Shell
- GraalVM Native support (more on this later)
- Spring WebFlux (Reactive Web)
- Generate and download the .zip file, then open it up in your favorite IDE.

Creating a Hello Command
When building command line applications with Spring Shell, we write functionality in classes called "commands". Let's create a basic "Hello Command":
- Create a new package called
commands. - Create a new class
HelloCommandin thecommandspackage with the following annotations and methods:
import org.springframework.shell.standard.ShellComponent;
import org.springframework.shell.standard.ShellMethod;

@ShellComponent
public class HelloCommand {
    @ShellMethod(key = "hello", value = "Say hello")
    public String hello() {
        return "Hello, world!";
    }

    @ShellMethod(key = "goodbye", value = "Say goodbye")
    public String goodbye() {
        return "Goodbye!";
    }
}
The @ShellComponent annotation indicates that this class contains shell methods (annotated with @ShellMethod). The @ShellMethod annotation specifies the command name and the description. The key argument is the command you will use to execute the method and the value is the description that will appear in the help documentation.
Running the Application
When you run the Spring Boot application, it will launch the Spring Shell and you can type the command names and execute the hello() and goodbye() methods directly from the command line.
$ hello
Hello, world!
$ goodbye
Goodbye!
Customizing Shell Methods with ShellOption
You can use the @ShellOption annotation to customize the handling of shell method parameters. For instance, you can add an optional name parameter to the hello() method:
import org.springframework.shell.standard.ShellOption;

@ShellMethod(key = "hello", value = "Say hello")
public String hello(@ShellOption(value = "name", defaultValue = "world") String name) {
    return "Hello, " + name + "!";
}
Now, when you run the hello command with an argument, it will display a personalized greeting:
$ hello --name Dan
Hello, Dan!
Fetching a Random Dad Joke
Let's build the main functionality of our command line application: fetching a random dad joke from the icanhazdadjoke.com public API.
Create a new package model and a new record class DadJokeResponse:
public record DadJokeResponse(String id, String joke, int status) {

}
Create a new package client and a new interface DadJokeClient:
package dev.danvega.dadjoke.client;

import dev.danvega.dadjoke.model.DadJokeResponse;
import org.springframework.web.service.annotation.GetExchange;

public interface DadJokeClient {

    @GetExchange("/")
    DadJokeResponse random();
}
Update the DadJokeCommands class to fetch a random dad joke and output it to the command line:
import org.springframework.shell.standard.ShellMethod;
import org.springframework.shell.standard.ShellComponent;
import org.springframework.beans.factory.annotation.Autowired;

@ShellComponent
public class DadJokeCommands {

    private final DadJokeClient dadJokeClient;

    @Autowired
    public DadJokeCommands(DadJokeClient dadJokeClient) {
        this.dadJokeClient = dadJokeClient;
    }

    @ShellMethod(key = "random", value = "Get a random dad joke")
    public String getRandomDadJoke() {
        DadJokeResponse response = dadJokeClient.random();
        return response.joke();
    }
}
Ask Spring to turn that interface into an implementation at runtime by using the HttpServiceProxyFactory
@SpringBootApplication
public class Application {

    public static void main(String[] args) {
        SpringApplication.run(Application.class, args);
    }

    @Bean
    DadJokeClient dadJokeClient() {
        WebClient client = WebClient.builder()
                .baseUrl("https://icanhazdadjoke.com")
                .defaultHeader("Accept","application/json")
                .build();

        HttpServiceProxyFactory factory = HttpServiceProxyFactory
            .builder(WebClientAdapter.forClient(client))
            .build();
        return factory.createClient(DadJokeClient.class);
    }
}
Run the Spring Boot application and test the random command:
$ random
Why don't scientists trust atoms? Because they make up everything.
Building a Native Application
To make our command line application fast and portable, let's build a native application using GraalVM. Configure Logback and Spring Boot properties in application.properties to remove unnecessary logging and disable the Spring Boot banner:
logging.level.root=off
spring.main.banner-mode=off
Build the native application using Maven:
$ ./mvnw -Pnative -DskipTests=true clean package
The native application will be generated in the target directory.
Using the Native Application
Create an alias for the native application in your shell configuration file (e.g., .bashrc or .zshrc):
alias dadjoke="path/to/your/target/DadJoke"
- Run the native application by typing
dadjokein your command line:
$ dadjoke
Dad Joke> random
Why don't some couples go to the gym? Because some relationships don't work out.
Now you can enjoy random dad jokes anytime you want right from your command line!
Conclusion
In this tutorial, we built a command line application using Spring Shell that fetches random dad jokes from a public API. We demonstrated how to create shell commands, fetch data from an API, and build a native application using GraalVM for fast startup times.
As you can see, Spring Shell is a powerful tool that allows you to build command line applications using the familiar Spring Boot environment. Give it a try for your next CLI project!